
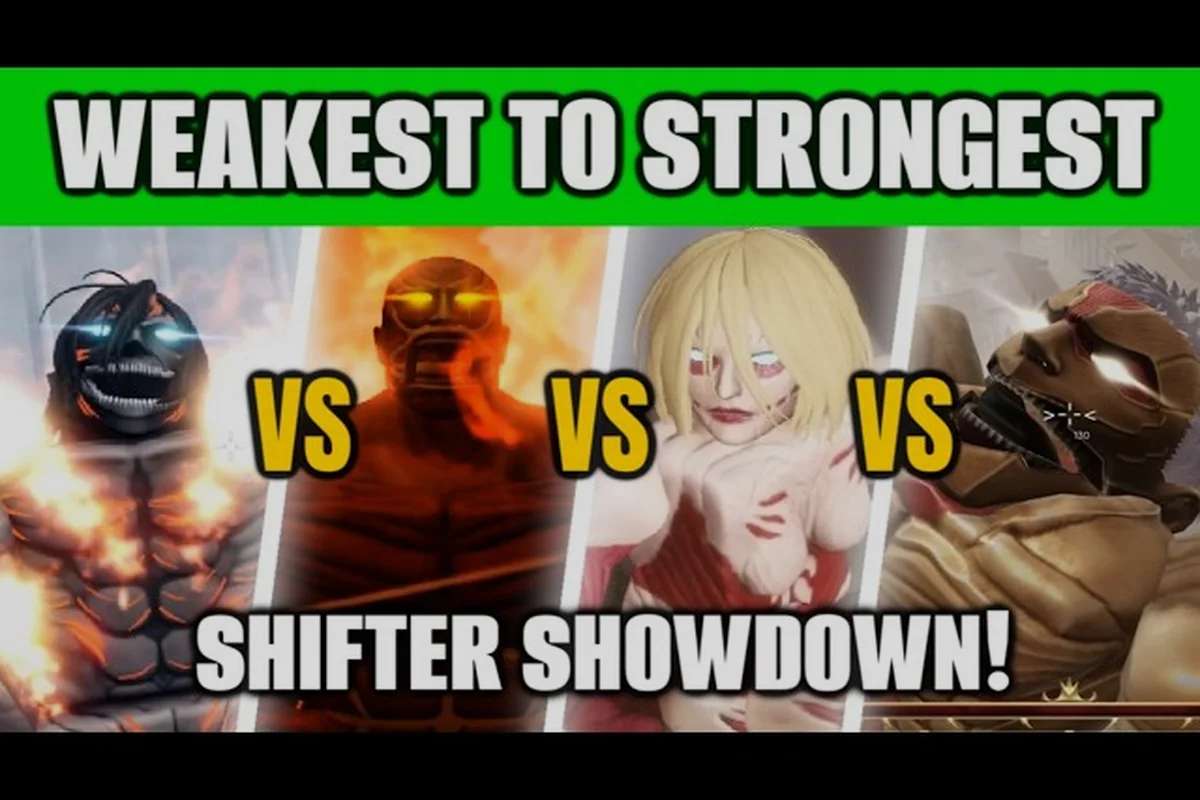
The Attack on Titan Revolution best shifter for raids is not one fixed class but the form that converts its Shifter Gauge into the highest practical damage while preserving mobility and crowd control. Pure damage dealers excel during boss openings, yet agile and armored shifters often perform better against multi-target raids because they can reposition, interrupt attacks, and sustain pressure between transformations; compare each form’s damage, control, survivability, and gauge timing before committing to a build.
Shifter Raid Overview
Attack on Titan Revolution shifters change the raid equation because a successful player can absorb damage, disrupt the boss, and create openings for teammates. The official Roblox experience page identifies Attack, Armored, Colossal, and Beast forms, each obtained through its own serum. The same source explains that shifting lasts for a limited window, making the shifter bar a resource problem as much as a damage problem.
That distinction is important. The strongest form is not automatically the right choice for every boss. A raid leader should compare peak damage, effective damage after transformation time, crowd-control value, and the risk of losing the form before the decisive attack lands.
| Raid need | Strongest consideration | Why it matters |
|---|---|---|
| Fast boss damage | Attack or Colossal | Short activation and strong offensive pressure |
| Front-line protection | Armored | Greater endurance against incoming attacks |
| Area control | Colossal | Creates space and interrupts close-range pressure |
| Sustained pressure | Beast | Mobility and chase potential favor active play |
| Beginner squad | Armored | Extra survival margin reduces costly mistakes |
A complete Attack on Titan Revolution shifter guide also needs to account for team composition. One titan cannot cover every role, so the practical goal is to combine complementary forms while preserving enough duration for each player to make a meaningful contribution.
Core Raid Decision Factors
Time-to-impact is the first factor because every transformation takes time that the boss can use. A form with excellent damage may underperform if it activates too late or ends before an opening appears. Raid planning should therefore compare each Shifter’s transformation time against the boss’s attack cadence and phase timer, rather than relying on raw Shifter damage alone. For example, a fast transformation can secure an early stance-grab window, while a slower form may need to be saved for a stun or movement pause. The practical test is whether the Shifter can begin dealing meaningful damage before the boss repositions, gains resistance, or forces the raid into survival mode.
Peak damage matters second, but it should not be treated as the entire ranking. Bosses change position, stun resistance may affect the opening, and the raid team may need to survive an extra phase. As a result, effective raid value is the product of damage and uptime rather than a showcase score.
Best Shifter Rankings for Attack on Titan Revolution Raids
The following ranking weighs the four confirmed titan forms for coordinated boss fights. It reflects the confirmed serum and form structure on the official game page, while the combat judgments are based on how each form’s practical advantages affect raid play.
| Rank | Shifter | Raid strength | Main weakness | Best raid role |
|---|---|---|---|---|
| 1 | Armored | Excellent survivability and dependable frontline presence | Damage may feel less explosive than Colossal | Anchor and protected attacker |
| 2 | Colossal | Excellent area pressure and burst potential | Missed activation windows can hurt | Burst and crowd control |
| 3 | Attack | Fast, agile, and effective for mobile bosses | Less forgiving against focused fire | Mobile damage dealer |
| 4 | Beast | Excels in mobility and pursuit | Requires active positioning and timing | Flanker and hunter |
Armored: The Raid Anchor
Armored earns the top recommendation in this Attack on Titan Revolution best shifter for raids ranking because raids punish players who contribute nothing after a mistake. Its endurance creates room for the team to recover, reposition, and time a stronger finishing sequence. That reliability can produce more total damage than a theoretically explosive build that loses its form at the wrong moment.
The Armored Serum also has a reported 0.03% drop chance, according to community showcases. That scarcity affects long-term planning because players cannot expect a regular farm, so raid leaders should treat an Armored player as a valuable asset rather than replaceable frontline coverage.
For a complete Attack on Titan Revolution shifter build, pair Armored with a damage-focused teammate. The titan’s job is to remain present and create safe attack windows, while another player converts those windows into boss damage. A family or passive setup that improves stability is usually more valuable for this role than a build that sacrifices all defense for a small theoretical damage gain.
Colossal: The Burst Specialist
Colossal is the strongest alternative when the raid needs immediate space or a concentrated damage window. Its larger form is naturally suited to intimidating groups of smaller enemies and pressuring a boss when the team can gather near it. However, Colossal still competes with the timer, so its value drops sharply when the activation begins after the critical opening has passed.
This form works especially well with players who can pull attention at the correct moment. A scout can draw the boss’s attention, then Colossal enters the area and redirects the encounter. Even when the damage is not as consistent as Armored, the disruption may be worth more because it prevents the boss from attacking the most vulnerable squad member.
The Attack Serum, Colossal Serum, Armored Serum, and Beast Serum each belong to a separate unlock path. Players comparing forms should therefore account for availability before finalizing a roster. A less developed but ready-to-use shifter can be a better raid choice than a stronger form that is still locked.
Attack and Beast: Fast Damage Options
Attack is a practical pick for agile bosses and players who prefer mobile positioning. Because it emphasizes fast pressure, it can fit a squad that already has enough durability elsewhere. This creates a useful division of labor: one player holds danger away from the team while another exploits the opening with rapid attacks.
Beast is also associated with mobility-oriented play, making it attractive for chasing evasive targets. Its value rises in raids where the boss changes position frequently or where a player can maintain pressure without standing in a direct damage lane. The limitation is dependence on execution; if the player cannot follow the target or protect the form, the theoretical speed produces little useful damage. Community showcases have also shown a female titan, although that form should be understood through community-tested information rather than official patch documentation. The existing titan showcase overview can help players separate confirmed mechanics from community discoveries.
Shifter Damage and Raid Timing Analysis
The best Attack on Titan Revolution shifter damage setup is not simply the one with the largest attack number. Raid bosses punish hesitation, and a shift consumes time that cannot be recovered. The relevant question is how much useful damage lands before the bar runs out and whether the team remains able to attack afterward.
Measuring Effective Damage
Start with a simple raid formula: effective damage equals damage during the form plus damage enabled by the transformation. The first term measures personal offense; the second recognizes that a successful shift can interrupt attacks, protect allies, or reposition the boss.
Suppose two shifters deal similar damage during their forms. If one creates a 12-second opening and the other only distracts the boss for four seconds, the first option creates more follow-up value. Conversely, if the fast form repeatedly expires without helping the team, its theoretical damage has little practical worth. The guide to keeping the shifter bar active provides additional resource-management options, while the core principle remains simple: preserving the form only helps when the team has a target worth attacking.
| Damage factor | Better result | Raid explanation |
|---|---|---|
| Transformation timing | Early, coordinated use | More of the boss’s health bar falls inside the form |
| Attack alignment | Stun or vulnerable window | Concentrated hits produce more value than scattered pressure |
| Post-shift position | Near allies or the boss | The player can contribute again without a long return trip |
| Bar preservation | Avoided waste | More of the form remains for the raid’s decisive phase |
| Team coordination | Agreed activation cue | Fewer players transform into awkward isolated positions |
When Peak Damage Beats Survival
Choose raw offense when the boss has a short damageable window, when teammates can provide reliable protection, or when the raid is already clearing the arena quickly. These conditions make a fast damage build preferable because Armored’s extra endurance would have little value if the boss disappears before it can threaten the formation.
Choose survival when the boss frequently interrupts the squad, when younger players need room to learn, or when a single mistake can end the encounter. Armored or a durable Colossal configuration can keep the raid alive through mistakes that would otherwise consume the team’s resources. The strongest raid build is therefore often the one with the least wasted damage, not the one with the largest isolated score.
Shifter Skills and Build Priorities for Boss Fights
An effective Attack on Titan Revolution shifter build should support a defined raid function. The available titan abilities and progression route differ from ordinary scout passives, so copying a standard damage build can leave a player with the wrong tools for the encounter.
Build by Role
A durable build should prioritize damage reduction, sustained form uptime, and useful encounter control. It should not chase a marginal attack advantage if that choice causes the player to leave the fight early. A player who understands the shifter unlock and mastery process can also plan whether progression investments are worth committing to a raid-only form.
| Build priority | Recommended approach | Raid reason |
|---|---|---|
| Tank | Maintain durable titan form and protect the core group | Prevents one mistake from disabling the whole team |
| Burst | Wait for a grouped attack opportunity before committing | Increases damage concentration |
| Mobile DPS | Attack from changing angles and preserve distance | Reaches exposed targets without taking excess hits |
| Control | Transform near the boss to interrupt or redirect attention | Creates a window for the rest of the squad |
Skill Decision Checklist
Before entering a boss fight, every shifter should know the activation signal, their opening target, and the condition that ends the form. Agreeing on a single cue reduces the chance that players transform in separate locations. If the boss teleports or changes aggro, the team should have a fallback: regroup, draw attention, and activate only when the opening returns.
The practical Attack on Titan Revolution shifter skills lesson is that positioning often affects output more than passive selection. A player who attacks into the boss’s strongest direction may deal less damage than another player who circles to an exposed side and finishes the same target. Use mobility until the opening is clear, then commit because waiting too long can let the bar drain without producing a valuable strike.
Shifter Versus ODM: Which Role Wins in Raids?
The Attack on Titan Revolution shifter vs ODM comparison should focus on contribution, not a simple winner. Scouts offer precision, mobility, and flexible positioning, while shifters offer burst, disruption, and a larger visual presence. A strong raid normally uses both because each compensates for the other’s limitations. An ODM player may be better when the raid needs rapid repositioning, precise attacks, or gas-efficient movement. Existing equipment knowledge still matters; the ODM controls reference explains gas management and blade durability factors that influence sustained scout damage.
| Role | Shifter advantage | ODM advantage | Best deployment |
|---|---|---|---|
| Burst damage | Heavy form damage | Faster repeated strikes | Shifter opens, scout finishes |
| Defense | Titan endurance | Better repositioning | Shifter protects, scout heals the formation |
| Crowd control | Large-scale disruption | Precise interruption | Shifter creates space, scout punishes |
| Weaknesses | Slow or costly transformation | Lower maximum endurance | Coordinate activation rather than duplicate roles |
| Late-raid value | Finishing power | Consistency | Preserve both until the decisive phase |
Shifters become more valuable when the boss’s attacks are difficult to avoid or when the team needs a front-line interruption. The correct composition therefore changes by encounter. One raid can favor a mobile scout build, while the next rewards an Armored anchor and a Colossal finisher.
Practical Raid Plan for Every Shifter
Use this sequence to turn a strong form selection into coordinated raid damage: apply the chosen Shifter’s combat buffs, confirm the encounter’s duration against the official game page, and reserve the Shifter bar for the most dangerous damage window. Because the bar is a limited-duration resource rather than an endless combat meter, activating it only after the team establishes aggro prevents the transformation from expiring before the final ODM or gear-assisted burst lands.
Before the Fight
Prepare the team by assigning one role per shifter. Armored holds the center, Colossal waits for a grouped opening, Attack hunts exposed angles, and Beast pursues targets that try to escape. Then choose a scout whose job is to draw aggro or interrupt a dangerous animation rather than compete with the titan’s damage window.
| Preparation step | Purpose | Result |
|---|---|---|
| Assign one role per shifter | Prevents duplicated priorities | Clearer team movement |
| Mark the activation cue | Synchronizes transformations | More simultaneous pressure |
| Reserve the bar | Prevents premature or wasted shifts | Stronger final-window damage |
| Identify retreat points | Gives players a safe recovery route | Fewer accidental raid deaths |
Best Shifter For Raids: During the Fight
Activate when the target is reachable, vulnerable, and facing the group. A transformation that starts while the boss is moving away may waste the form before useful contact. During the form, focus on one target instead of switching constantly, and communicate when the bar is entering its final portion.
Community reports describe an approximately 0.1% Yeager chance, while legendary clan showcases are reported near 0.5%. These percentages are community-reported rather than official guarantees, but they illustrate why reliable forms should be reserved for encounters where their active value is clear.
After the Form Expires
Do not immediately chase the boss back into danger. Use the recovery interval to regroup, let a scout draw attention, or prepare the next coordinated opening. A shifter who wastes the first form and never creates a second useful window contributes less than one who repeatedly creates smaller but safe openings.
The final raid rule is simple: every transformation should produce damage, control, or protection. If a shift accomplishes none of those, the team may need to reconsider the activation timing. That discipline makes the Attack on Titan Revolution best shifter for raids choice more than a tier label; it becomes part of a repeatable team plan.
Frequently Asked Questions
Which shifter is best for raid bosses in Attack on Titan Revolution?
Armored is the safest general recommendation because durability preserves the player’s contribution through mistakes and creates room for teammates to attack. Colossal may outperform it during a strong burst window, while Attack and Beast suit raids that demand mobility. The final choice depends on boss behavior and the rest of the squad.
Does Colossal deal more damage than Attack for raids?
Colossal can offer greater burst and area pressure during its limited form, but its value depends on activating near the boss and landing grouped hits. Attack can be the better damage option against mobile targets or when fast repositioning matters. Compare effective damage across the full encounter rather than judging a single attack.
Should every raid player use a shifter?
No. Shifters provide valuable burst and crowd control, but ODM scouts contribute mobility, precision, and consistent follow-up damage. A balanced raid can combine a durable shifter, a burst specialist, and flexible scouts, because leaving every role uncovered can make boss recovery and target selection difficult.
How important is the shifter bar during a raid?
The bar is essential because the form lasts only for a limited window. Players should reserve it for a meaningful opening, coordinate activations, and avoid shifting while the boss is out of reach. Preserving the bar helps only when the team can convert that remaining time into useful damage or protection.