
Attack on Titan Revolution Freedom difficulty matters because it is the game’s highest raid tier, where weak gear and poor routing stop producing reliable progress. This guide explains how to prepare, choose missions, and farm rewards for Attack on Titan Revolution hardest content.
Freedom Difficulty Overview
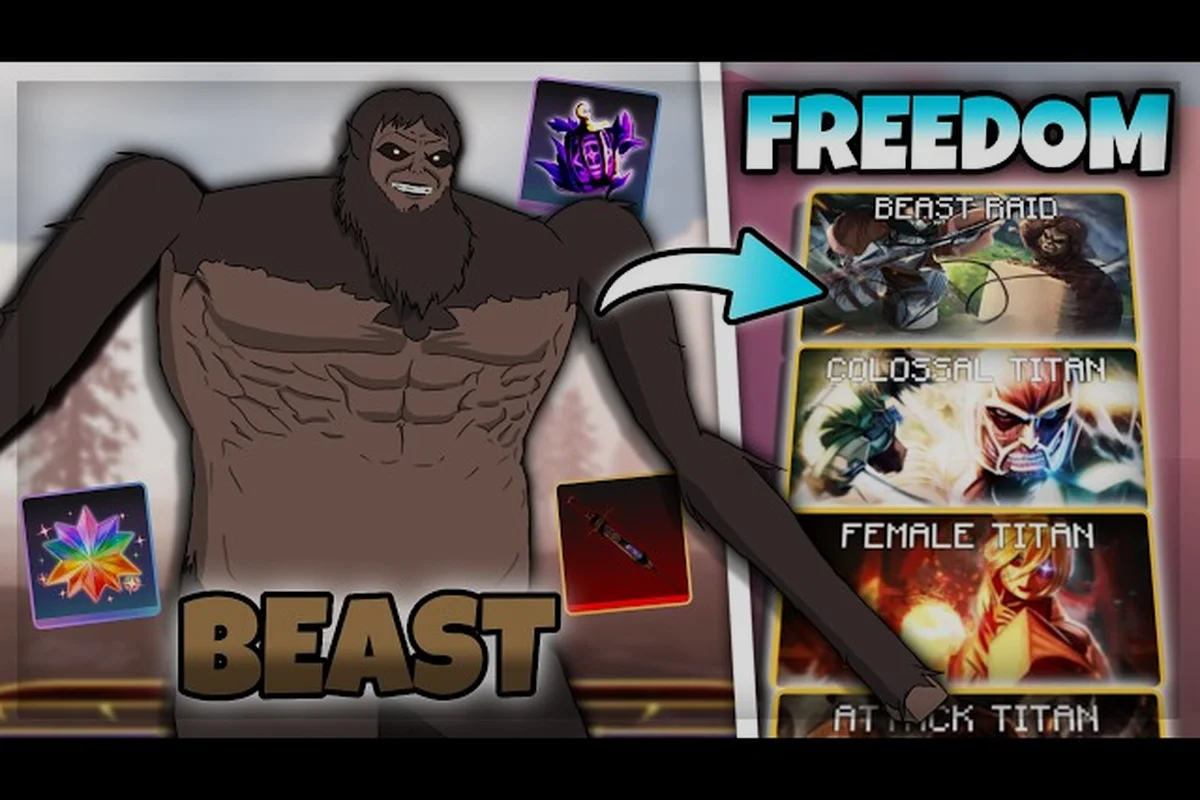
Freedom difficulty was added with Update 5 as the highest tier, and community gameplay has already tested it against the Beast Titan. That distinction matters: older guides may describe the raid ladder accurately while missing the stricter gear, endurance, and execution requirements of Freedom. The game page on Roblox identifies raids and their difficulty tiers as core endgame features, while verified player videos provide practical examples of how those encounters are handled in motion.
The broader raid structure follows a clear progression. Attack Raid serves as the standard starting point, Aberrant Raid acts as the community’s mid-game damage check, and later targets include the Armored Titan Raid, Rumbling, and Warbringer. Freedom sits above that playlist and changes the standard of each attempt. It is not simply another step with a bigger health pool; you need to approach it as a complete endgame check involving damage, survivability, movement economy, and target prioritization.
| Raid tier | Main role in progression | What it tests most clearly |
|---|---|---|
| Attack Raid | Standard entry point | Basic combat readiness and mission pacing |
| Aberrant Raid | Mid-game damage check | Whether current damage can defeat a tougher target |
| Armored Titan Raid | Specialized fight | Pressure against an armored enemy |
| Rumbling | Late raid objective | Sustained pressure in a high-intensity encounter |
| Warbringer | Advanced raid content | Endgame execution and resource management |
| Freedom difficulty | Highest tier | Gear readiness, consistency, and mastery of core mechanics |
This raid ladder is why a practical Attack on Titan Revolution endgame guide should begin with progression rather than a universal damage threshold. There is no verified public stat sheet showing one gear number that guarantees a Freedom clear. Gear scores can help players compare upgrades, but the strongest recommendation is to treat Observed clear readiness as a combination of equipment quality, perk synergy, and reliable execution.
What Changes at Freedom Difficulty
The verified information about Freedom comes from Update 5 coverage and community testing, so it should be separated from older, well-established raid details. Freedom is confirmed as the new highest tier, and players have tested it against the Beast Titan. However, precise enemy tuning, universal best gear, and fixed clear thresholds are not available from an official balance chart. Treat numerical benchmarks as personal checkpoints rather than developer-specified guarantees.
| Preparation checkpoint | Strong signal | Weak signal |
|---|---|---|
| Gear | Upgraded endgame pieces with useful stats | One unusually high item while the rest remains outdated |
| Perks | Several perks reinforce the chosen damage style | A single strong perk with no supporting build |
| Movement | Repeated attacks preserve enough stamina | Damage looks strong while mobility is consistently exhausted |
| Missions | The chosen farm rewards support the next upgrade | Farming without checking what currency is needed |
This checkpoint model is more useful than an invented threshold because Freedom difficulty is meant to expose weak links. A player can enter with excellent attack power and still struggle if the build lacks sustain, mobility, or dependable mission rewards. Conversely, a balanced setup with upgraded equipment and clear resource management may outperform a glassier build that spends all of its stamina on the opening attack.
Gear and Build Benchmarks for Freedom Raids
Preparing for Attack on Titan Revolution hardest content requires more than replacing one low-level weapon. Because Freedom is the highest tier, every part of the loadout should contribute to a dependable cycle of movement, attacks, and recovery. Start with the gear you use for the toughest successful raid, then compare each piece by the stat it actually improves instead of chasing a single number that may not represent the complete build.
The best build overview provides a useful framework for judging whether your damage, speed, stamina, and survivability choices work together. For Freedom, however, the build should be tested inside the intended mission. A setup that performs well during ordinary farming may still fail when a boss changes direction, closes distance, or forces repeated repositioning.
Establish an Endgame Gear Ladder
Use the following ladder to make practical decisions before entering a Freedom attempt. These are preparation benchmarks, not official unlock requirements, and they are designed to organize your own testing. Treat a successful clear as a repeatable result: test the Late endgame loadout against Armored or Aberrant missions first, then compare clear speed, stamina management, and damage taken with a run using an upgraded Trial-ready setup. If a Freedom attempt fails intermittently, identify whether the cause was an attack-speed bottleneck, poor armor survivability, or insufficient perk links before changing gear wholesale. The crit-focused build guide is useful when critical damage is already meaningful, but high critical chance cannot compensate for lost stagger pressure, uncontrolled stamina, or a survivability gap against Rumbling and Warbringer encounters.
| Gear stage | Useful purpose | Readiness for Freedom |
|---|---|---|
| Early endgame | Clearing Attack and Aberrant raids | Build basics are forming, but upgrades remain active |
| Mid endgame | More consistent Aberrant and Armored clears | Suitable for testing harder fights |
| Late endgame | Handling Rumbling and Warbringer content | Primary candidate for Freedom attempts |
| Trial-ready | Upgraded endgame gear with a coherent stat profile | Clear attempts should be consistent rather than lucky |
| Maintain | Small upgrades to the strongest gear and perk links | Supports repeated farming and tougher attempts |
Begin with your Late endgame loadout. If mission completion feels random, focus on the weakest link rather than replacing everything at once. The crit-focused build guide is useful when critical damage is already a meaningful part of your setup, but a high critical chance is not a substitute for attack speed, stamina control, or survival.
Test Three Practical Build Benchmarks
A clear benchmark should combine equipment, perks, and play patterns rather than rely on the inventory screen alone. Track these three tests before attempting Freedom repeatedly: test whether your ODM Gear can sustain a full attack sequence, whether your equipped Perks support stamina recovery, and whether you can preserve positioning during the raid’s pressure phases. For example, if a run ends before the target is staggered, the issue may be gear efficiency or Tenacity thresholds rather than the rarity of a single item. Comparing these results across several attempts shows whether the problem lies in Preparation, combat execution, or mission rewards.
| Benchmark | Pass condition | If it fails |
|---|---|---|
| Opening damage | You can use a meaningful attack sequence without immediately losing control of positioning | Reduce risky movement and improve gear efficiency |
| Mid-fight recovery | You can create space or maintain pressure after several exchanges | Add sustain and review stamina spending |
| Finish window | The target can be brought down before the fight becomes prolonged or chaotic | Improve damage consistency and target focus |
Community-reported percentages for rare items and clan systems should not be treated as required Freedom benchmarks. For example, the reported 0.03% Armored Serum drop chance is a community-reported figure, while displays for a Yeager family at roughly 0.1% and a legendary clan at roughly 0.5% also come from community showcases rather than official patch notes. These numbers describe acquisition rarity, not a direct readiness formula for the highest raid tier.
Prepare a Backup Loadout
Freedom attempts can consume time, mission attempts, and other limited resources. Keep a second endgame setup ready with a different balance of damage and survivability. If your main build emphasizes burst, the backup should preserve more recovery; if it emphasizes sustained attacks, the backup can carry a faster opening sequence. This is particularly helpful for players whose preferred build performs well in short fights but runs out of steam when the target remains active longer than expected.
Raids and Mission Selection
Choosing where to farm is one of the most important decisions in an Attack on Titan Revolution endgame guide. The official game-page research distinguishes the reward structure clearly: raids pay Serums and gear, while Waves pay Shards. That means the most efficient farm depends on your next purchase. A mission can be difficult and rewarding without being the best choice if its currency does not solve your current gear shortage.
The Attack Raid is the standard entry point, while Aberrant Raid functions as a useful mid-game damage check. Later raids target more specialized pressure, including the Armored Titan, Rumbling, and Warbringer. Freedom raises the execution ceiling, but it should not erase the value of earlier content. If you need basic serum income, a lower raid can be more valuable than repeatedly failing a Freedom attempt.
| Current need | Best reward target | Why it may be the better mission |
|---|---|---|
| General endgame gear | Raid encounters | Raids provide Serums and gear, matching direct equipment upgrades |
| A specific gear slot | Missions that drop that equipment category | Focus prevents inventory clutter and makes progress measurable |
| Faster currency accumulation | Wave-oriented farming | Waves reward Shards rather than raid gear and Serums |
| Practice before Freedom | Aberrant Raid | It serves as a community-recognized mid-game damage check |
| A genuine high-tier test | Freedom difficulty | It is the confirmed highest difficulty tier |
Identify the Attack on Titan Revolution Best Mission to Farm
The best mission to farm is the one whose rewards solve the next bottleneck. Do not enter a long raid merely because it is labeled as endgame content. First identify whether the next upgrade needs a serum, a gear category, several stat changes, or simply a better mission reward rate. Then compare the options in the mission and reward menus, since exact drop rates and encounter rules can change between updates.
Use a two-track farm plan for Attack on Titan Revolution: reserve the highest-difficulty raids for a specific gear or family-benefit target, while using repeatable Story Mode and Event missions to build the Sergeant, Scout, or Warrior stat requirements behind Freedom difficulty. For example, if an upgrade needs several Warrior stat points rather than a rare Gear drop, farming an easy raid that consistently awards useful Shards may be more valuable than chasing a low-rate mission reward. Because exact mission drops can change after updates, verify the reward screen before each route and adjust the plan when the required item is already banked.
-
Write down the next upgrade. Specify the exact gear slot, family benefit, or permanent progression resource you need.
-
Match the reward type. Choose raids for Serums and gear or Waves for Shards.
-
Compare consistency. Favor a mission you can complete reliably over one that merely has a higher theoretical reward.
-
Account for time. A slightly smaller clear that takes less time can produce more currency over an identical session.
-
Stop when the upgrade lands. Return after collecting the item needed for the next stage.
This process matters when selecting the Attack on Titan revolution best mission to farm because it rewards planning rather than automatic repetition. It also protects the resources required for Freedom. A player who enters the highest tier too early may spend multiple attempts without improving the actual gear or build weaknesses causing the failure.
Read Mission Rewards Before Committing
The Attack on Titan Revolution mission rewards interface should be treated as the source of truth for the current version. The how to farm spins guide offers another practical frame for maximizing repeated runs, but mission rewards remain more relevant when your immediate target is a raid upgrade.
| Reward question | What to record |
|---|---|
| Does the mission award Serums? | Compare the visible reward with your current gear budget |
| Does it provide gear? | Check the possible categories and the chance of an upgrade |
| Does it award Shards? | Use that mission only if Shards advance your current goal |
| Is completion the bottleneck? | Improve survivability or choose a lower tier |
| Is damage the bottleneck? | Test a more aggressive build or better endgame gear |
Do not claim a universal mission as the permanent best farm. Update 5 changed the Freedom tier, and future adjustments may alter reward tables or encounter behavior. Always inspect the current in-game list before committing an entire session to one activity.
Preparation Routine Before a Freedom Attempt
A Freedom attempt succeeds when preparation is treated as a sequence rather than a final gear check. Start by completing a lower-tier raid with the intended setup, then test the same build on a harder encounter. This sequence reveals whether your gear can actually function under attack pressure before you commit scarce resources to the highest tier.
Run a Four-Step Readiness Check
| Order | Action | Purpose |
|---|---|---|
| 1 | Inspect current gear and mission rewards | Confirm the exact upgrade path and available reward type |
| 2 | Clear a standard Attack Raid | Check attack timing, stamina use, and mission completion |
| 3 | Test Aberrant or another advanced raid | Measure the build against stronger enemy behavior |
| 4 | Attempt Freedom with the same core setup | Reduce variables and identify the remaining weakness |
The goal is not to win every attempt. It is to reduce uncertainty before the Freedom attempt. If movement fails in the standard raid, a harder target is unlikely to expose useful new information; it will only make the source of the problem harder to identify. By progressing in stages, you can distinguish a gear problem from a handling problem.
Preserve Momentum During Combat
The movement economy in a Freedom attempt depends on making every attack count. Avoid spending the entire stamina bar simply because an opening window appears. Keep some capacity for correction, because a missed approach against a large enemy can turn a clean damage sequence into a recovery sequence. This is especially important when the mission ends only after the target is defeated rather than after a fixed damage threshold.
Useful habits include entering each Freedom mission with a fixed attack plan: lock the ODM target, route around the enemy’s rear flank, and build damage around one complete string rather than repeatedly starting new strings. If a strike misses or leaves you exposed, reset immediately instead of forcing another attack; preserving ODM gas and maneuvering space usually creates more total damage than chasing a risky finisher in an awkward position.
-
Open with purpose: Use the initial approach to establish a reliable attack angle instead of forcing maximum damage from an awkward position.
-
Watch the stamina bar: Leave enough movement capacity to disengage from a bad angle or respond to a sudden enemy action.
-
Keep the pattern repeatable: A simple sequence that survives several fights is more valuable than a perfect opening used once.
-
Record failure causes: Note whether damage, defense, range, or stamina caused the reset.
-
Avoid one-variable testing: Change gear or strategy alone, then rerun the same mission.
For additional practical examples, the verified video The ABSOLUTE BEST WAVES GUIDE by Plas illustrates the value of planning repeatable farming routes. Although Waves and Freedom are separate activities, the principle is transferable: select missions for their actual reward purpose and keep the route efficient.
Reward Farming and Long-Term Endgame Progression
Freedom progression is not a single victory followed by completion. Endgame play continues through targeted farming, incremental gear replacement, and repeated checks against the highest difficulty tier. Your priority should be a reward loop that converts each run into a measurable upgrade instead of allowing time and resources to disappear into failed attempts.
Build a Three-Stage Farming Loop
| Stage | Main action | Reward objective |
|---|---|---|
| Upgrade | Complete the raid or mission that awards the needed gear or serum | Fill the next gear slot or improve a weak stat |
| Consolidate | Test the new item against a standard raid, then an advanced one | Confirm that the upgrade works in real encounters |
| Challenge | Attempt Freedom when the build is stable across several runs | Test whether the upgraded setup can handle the highest tier |
This loop is particularly important for Attack on Titan Revolution mission rewards. A reward is only valuable when it fills a real progression need, and a new item is only useful when it improves the build rather than creating awkward stat overlap. Keep notes on the slot, item type, and key benefit so that later farm decisions remain focused.
Make Resource Decisions by Goal
Serums, Shards, and equipment serve different purposes. Serums support raid-oriented gear and serum resources, Shards come from Waves, and gear drops provide direct equipment changes. Players should avoid farming all three indiscriminately, since that dilutes time across multiple progression tracks without accelerating the Freedom stage.
| Current objective | Resource priority | Activity pattern |
|---|---|---|
| Replace an outdated item | Gear-focused raids | Farm until the needed category appears |
| Afford a serum-based upgrade | Serum income | Repeat reliable raid clears |
| Save for a separate progression system | Shards | Use Wave farming with a consistent route |
| Test the new build | No new farming target | Run standard and advanced encounters before Freedom |
When comparing mission reward values, look at the whole session rather than one completion. A fast mission that you can clear repeatedly may outperform a slower high-tier fight, but only if its listed rewards advance the same goal. If the harder mission offers exactly the item you need, reliability and time spent per successful drop still determine the result.
Know When to Return to Freedom
Do not change gear every time an attempt fails. After each Freedom raid loss, record whether damage output, positioning, ODM Gas, or mission rewards caused the setback, then adjust only the relevant factor. For example, if one gear slot absorbs most of the damage, replace that slot before rerunning the mission; if the target survives but the reward is secured, compare the route and target priority instead of treating the attempt as a complete failure. This keeps each Freedom difficulty test measurable rather than disguising the cause with several equipment changes.
-
Did the target remain alive because damage was insufficient, or because positioning prevented attacks?
-
Did the run end because the character had no stamina for recovery?
-
Did an incoming attack interrupt a sequence that normally works?
-
Was the mission reward collected despite the failed final target?
-
Did a single gear slot account for most of the damage loss?
When failures repeat with the same cause, make one targeted adjustment. If gear is not the issue, changing multiple items can hide the solution and make the next run harder to evaluate. The Waves guide can help players compare time-efficient farming routes, while Freedom-specific testing should remain centered on the raid encounter rather than imported mechanics from another game.
Advanced Troubleshooting for Attack on Titan Revolution Hardest Content
Even well-equipped players can struggle because their routine is optimized for a different activity. Older farming routes, long Waves runs, and lower-tier raids can encourage habits that break down against Freedom. Troubleshooting should focus on observable behavior: where damage was lost, when stamina disappeared, and whether the player could keep a usable angle.
Diagnose Common Failure Patterns
| Failure pattern | Likely cause | Targeted correction |
|---|---|---|
| Strong opening, then little damage | Stamina was spent on approach or recovery | Shorten the opening sequence and reserve movement |
| Damage feels inconsistent between runs | Gear synergy or attack timing varies | Test one item change at a time |
| The target survives every phase | Overall damage is below the required level | Farm raid gear and improve the weakest stat |
| The character cannot finish | Survival and recovery are insufficient | Add sustain and shorten vulnerable windows |
| A lower raid works but Freedom fails | The build lacks high-tier pressure handling | Test Aberrant or another advanced encounter |
Community videos can reveal handling techniques, but they should not be treated as universal rules. The verified video Going From Noob To Pro In Roblox Attack On Titan Revolution by OMEGA EX offers a progression-focused example of how players develop combat habits. Players may also report different results depending on their gear, mission, and current game version, so community observations should guide testing rather than serve as official balance values.
Avoid Imported Mechanics and Unconfirmed Content
Attack on Titan Revolution is a specific Roblox release, and advice from another Attack on Titan game can produce the wrong habits. Use the current mission interface and enemy behavior for placeId 13379208636. Likewise, do not treat trailer appearances as playable features: the Warhammer Titan has appeared in older trailer footage, but its playable status is unconfirmed.
The same caution applies to rare progression systems. Divine perk, Vessel, and Beast Titan unlock details discussed by players come from community showcases rather than official patch notes. They may help explain why some players report unusual progression, but they should not be presented as guaranteed routes into Freedom or as official benchmarks.
Review Your Setup After Every Patch
Update 5 introduced Freedom as the highest tier, so it is reasonable to expect later changes to affect how the raid ladder feels. After an update, repeat the four-stage readiness check using the same equipment and mission route. Compare completion speed, failure point, and reward collection rather than relying only on whether the final boss falls.
A compact update log helps maintain the strongest Attack on Titan Revolution endgame guide for your own account: track each Freedom raid attempt against a fixed baseline, including mission route, ODM Gear loadout, clear time, failure point, and collected rewards. For example, if the same Freedom boss previously caused a defeat after ODM Gear was swapped for a different perk set, record that variable rather than blaming the mission alone; repeated routes with unchanged equipment then show whether the update improved consistency.
-
Date and update name.
-
Freedom clear or failure point.
-
Mission and reward collected.
-
Gear or perk change made afterward.
-
Whether the change improved repeat consistency.
This approach keeps the guide grounded in current results without pretending that community observations are official balance rules. For example, if a Freedom raid clear improves from 4:30 to 3:55 after a patch, but the same ODM Gear loadout still fails during the final phase, the useful conclusion is that the raid became easier overall without eliminating its hardest difficulty spike. Treat these clear-time and consistency comparisons as practical evidence, then verify them through repeat Freedom attempts rather than presenting them as confirmed developer balance changes.
Freedom Difficulty Checklist
A final Freedom checklist should be brief enough to use before every serious attempt. The value comes from answering with evidence: a successful lower raid, a current mission reward target, a coherent gear profile, and a known recovery plan. If one answer is uncertain, complete the missing test before spending another attempt.
Ready for the Highest Tier
| Check | Ready condition |
|---|---|
| Gear | Your strongest endgame equipment is equipped with no unfinished upgrade in progress |
| Build | Damage, mobility, stamina, and survivability reinforce each other |
| Test | The setup performs reliably on a standard and an advanced raid |
| Rewards | You know whether the session needs Serums, gear, or Shards |
| Recovery | You can identify the phase where stamina or positioning usually fails |
| Patch state | You are using current in-game information rather than an outdated guide |
Use this checklist as a decision tool rather than a checklist to complete every box. A player may still attempt Freedom before every recommendation is ideal, but they should understand which weakness is likely to cause the failure. That turns a reset into useful information and helps direct the next farm.
The Core Takeaway
Attack on Titan Revolution Freedom difficulty is the highest confirmed raid tier, and meeting that challenge requires more than a single large stat. Build around coordinated endgame gear, confirm the setup on lower raids, inspect current mission rewards, and choose Serums, gear, or Shards according to the upgrade you actually need. Treat community numbers as reported evidence, not official guarantees, and make one deliberate improvement at a time. That process turns each farm into a stronger foundation for Freedom and keeps the highest-tier challenge from becoming blind repetition.
Frequently Asked Questions
Can beginners clear Freedom difficulty in Attack on Titan Revolution?
Beginners can attempt Freedom, but the highest tier is better approached after developing reliable gear, movement, and mission habits. Test the intended build on a standard Attack Raid, then use Aberrant Raid or another advanced fight as a stronger check. If repeated losses come from positioning or stamina, improve those fundamentals before changing gear, because Freedom will expose both weaknesses.
Which mission should I farm before attempting Freedom difficulty?
Choose a mission whose current rewards solve your next equipment bottleneck. Raids award Serums and gear, while Waves provide Shards, so neither activity is universally best. Farm raid gear when your current set needs replacement, use Wave routes for Shards, and favor reliable completions over fights that consume too much time for their reward value.
Is there an official gear score needed to clear Freedom difficulty?
No verified official gear threshold establishes a guaranteed Freedom clear. Gear strength, perk synergy, stamina control, and target handling all influence performance. Use successful clears on lower and advanced raids as personal benchmarks, then make one measured upgrade at a time rather than relying on an unsupported universal number.
What should I do if my damage disappears during a Freedom attempt?
Check whether your opening attack consumed too much stamina or forced you into a poor position. Record the point where damage stops, then test a shorter approach that preserves movement and recovery. If the same problem continues after positioning improves, farm raid gear and strengthen the weakest relevant stat instead of changing the entire build at once.
Are rare drop percentages reliable indicators of Freedom readiness?
No. Community-reported acquisition figures such as the 0.03% Armored Serum drop rate describe item rarity, not a direct readiness formula. They also may not reflect every account or current version. Compare your actual build against successful lower-tier clears, and use those results to determine whether more farming will improve Freedom performance.